Posts

Week 25 - Conclusion

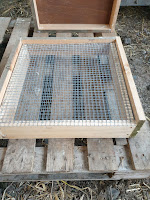
Learning to build a Beehive I have discovered that learning to build a beehive is not as straightforward as maybe building a birdhouse for example; as a hive needs to be built to an exact standard. This is because bees are quite particular about their home structure, also a poorly constructed one causes problems for the beekeeper as well. It is important to check for signs of a new Queen or disease to ensure the colony’s survival.  So, if the hive is not constructed properly, all kinds of problems could arise and make inspections more difficult and ultimately put the colony at risk. Rather on focussing on how to design a radical new shape of hive, I did some research on existing models and it was apparent that there are four main types of hive that continue to be popular amongst beekeepers today; from the reasons stated in my blog, I opted for the British Standard hive to build. Once I had chosen the design, it was straightforward enough to set out plans and measurements fo...

Week 24 - What I have changed and what I would improve

Image
In this blog post I will be talking about how different the hive is compared to the design I drew and what I have changed and for what reason and also what I would do differently if I made another hive. First off is the floor, if you compare it to my original design, you can clearly see that I didn't include a wired floor in my plan but I have now included this. This is because at the time when I drew my design I was still unsure about what to do - whether I wanted it to be wooden or wire, so I just didn't include it.  I also changed the hive entrance; in the design I had a block of wood that is different to the one in my hive. This is because I thought it would be to challenging to chip out a small piece of wood for the bees to enter and exit out of. So I found it easier just cutting the piece of wood in two, and it would allow more bees to get through the entrance. Another thing that is mentioned in my plan is the hive tray, which is underneath the wire floor. The reason why ...

Week 23 - Extra parts that need finishing off

Image
  Roof For the finishing off of the hive there are a few things that need to be done. First I am starting on the roof, for the roof I need to add insulation in the gap left in the middle that you can see in the photograph to the left. I am doing this because it will help the bees in the colder months to regulate the hives temperature, by keeping the bees warmer for longer. In this picture I am cutting the piece of board that is an offcut from the board I used to make the crown board. It is the perfect size for the gap in the roof, and it will help to keep the insulation in place. I am only cutting abut 10mm from the end of the board just so it can fit in. I am using the saw because I am only removing 10mm - this would be too difficult and potentially too dangerous to use the circular saw  as it could cause injuries. Here I am putting the insulation into the roof, you can see that I have chosen to use straw as insulation for the hive. This is because it is very light, so it won...

Week 22 - Progress so far

Image
The current status of my hive build is as follows: This is the floor of the hive, it is obviously located at the bottom and it holds the weight of all the different sections of the hive. This is also where the hive entrance is, which controls how many bees can leave and enter; the hive tray is at the back which catches any unwanted materials like pieces of comb or unwanted pollen. It can also block any cold air from entering during the winter to keep the hive warmer for longer and make it easier for the bees to regulate the heat of the hive. It is almost complete now, apart from the hive entrance that I still need to finish off. This is the brood box and is where the queen bee and all the worker bees are born, work and live. It is where the queen bee lays the eggs in all the frames that are held within the brood box. This brood box sits on top of the floor of the hive and is below the super box. It is complete and there is nothing else I need to improve on it and it is ready to be used...

Week 21 - design and label the roof and build it

Image
This week I am starting to design the roof of the hive and I will also label it. The roof is basically what it sounds like, it is the roof of the hive that helps protect it from all weathers throughout the year. It sits at the top and can be sloped, or flat with aluminium or roof felt to help it last longer and be protected longer. The roof can also overhang over the sides of the hive, or can sit flush with it, and also some rooves can have insulation inside them to help the bees keep the hive warm quicker and longer in the winter. My early designs of the roof of the hive are illustrated below and labelled: Below are the pictures of me building the roof of the hive at the different stages: First I need to cut the wood down to the correct size for the roof, because the roof sits on top of the hive, there is no specific measurement; and it can be any height I want it to be. I decided to cut it at 100mm, which is half of the plank, this is to save me from using to much wood and wastage. N...

Week 20 - Design and label the Crown Board and build it

Image

Week 19 - Design and label the super and build it

Image
This week I am starting to design the super box of the hive and I will also label it as well. The super box is basically the same as the brood box in every way, the only difference being that it is smaller than the brood box. The main purpose of the super box is to act as an area or space for the bees to store honey and keep it there until it is needed, also in the Winter months it can also  provide an 'extra area of space' for the bees. If there is no extra brood box (or there is one needed), the super box can be used to act as a brood box as it is exactly the same in every way, except that the brood box has far more depth. My early designs of the super box of the hive are illustrated below and labelled: Below are the photographs of me building the super box for the hive, at the different stages: Firstly, I measured the length of the brood box I had just built, this is because the hive will have to sit on top of the brood box perfectly in flush. The only thing that I need to m...